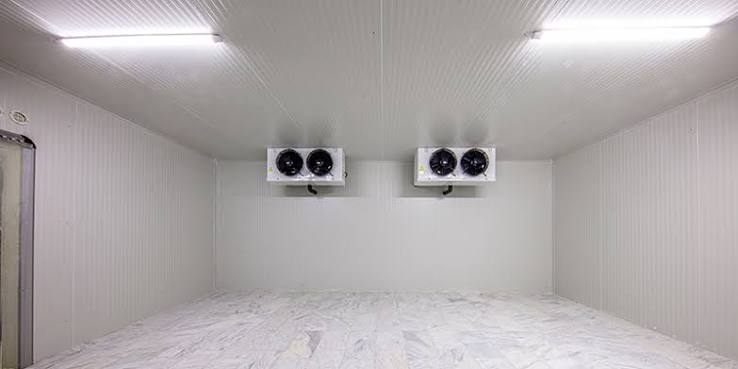
You can buy the best Sandwich Panel in the world and still end up with a building that leaks, loses energy, and fails prematurely if the installation is not done right. The performance of a Sandwich Panel system depends as much on how it is installed as on the panel themselves.
This guide walks through the actual installation process from start to finish. Whether you are a contractor managing the project or a building owner who wants to understand what to expect, this covers the steps that matter.
Step 1: Site Preparation
Before any panel arrive on site, the area needs to be ready. This means the foundation or floor slab must be complete, level, and cured. The slab surface should be clean with no debris, oil, or loose material that could interfere with panel placement.
Check that the foundation dimensions match the building plans. Even small discrepancies in slab level or squareness can cause alignment problems as panel go up. Use a laser level or string line to verify the slab is within 3mm of level across the full span.
If you are installing panel on an existing structure, inspect the steel frame or columns for damage, corrosion, or misalignment. Any issues with the supporting structure need to be fixed before panel go up, not after.
Step 2: Panel Storage on Site
Sandwich Panel need to be stored flat on a level surface. Stacking them on uneven ground can cause warping that affects joint tightness later. Keep panel off the ground using timber dunnage spaced at regular intervals.
Protect panel from rain and standing water. While the steel facing is weather-resistant, prolonged exposure to moisture can cause corrosion at cut edges and joints. If panel will be stored for more than a few days, cover them with a tarp but allow air circulation underneath.
Handle panel with care. Dropping or dragging panel can dent the steel facing, damage the core, or break the bond between layers. Use suction lifters or foam-padded clamps when moving panel, never bare chains or metal slings.
Step 3: Alignment and Placement
Start with the first panel at a corner or at a predetermined reference point. The first panel sets the alignment for everything that follows, so take extra care to get it plumb and square.
Use a plumb bob or laser level to check vertical alignment. For horizontal alignment, a string line stretched between reference points works well. Panel should be installed with the male edge pointing up for wall panel, which allows the joint to shed water naturally.
Leave a small gap, typically 2 to 3mm, between adjacent panel. This gap accommodates thermal expansion and allows sealant to fill the joint properly. Do not try to push panel tightly together with no gap, as this can cause buckling when temperatures change.
Step 4: Fastening
Fastening method depends on the panel type and application. For wall panel, self-drilling screws with neoprene washers are the standard. The screws pass through the outer steel facing and bite into the structural frame behind.
Space fasteners according to the panel manufacturer's specifications, typically 300 to 500mm apart along the structural members. Too few fasteners means the panel can move under wind load. Too many fasteners create unnecessary thermal bridges through the steel.
Do not overtighten the screws. The washer needs to compress slightly to create a seal, but overtightening crushes the washer and damages the panel facing. The goal is a snug fit with the washer just compressed, not flattened.
For roof panel, additional fasteners may be needed to resist uplift forces. Consult the panel manufacturer's load tables for the correct spacing based on your local wind speed requirements.
Step 5: Joint Sealing
This is the step that makes or breaks the installation. Every joint between panel must be sealed to prevent air and water infiltration. The process varies depending on the panel system, but the principles are the same.
For cam-lock panel, apply a continuous bead of silicone sealant along the male edge before joining. Once the panel are locked together, the sealant fills the gap and creates an airtight barrier.
For exposed fastener systems, apply sealant at the panel overlap and under the screw heads. Use a high-quality silicone or polyurethane sealant rated for the temperature range of the building.
After sealing, inspect every joint visually. Look for gaps, uneven sealant beads, or areas where the sealant may have pulled away from the steel surface. Touch up any deficiencies immediately. A small air leak today becomes a big ice problem tomorrow in cold storage applications.
Step 6: Flashing and Trim
Flashings cover the joints where panel meet other building elements like windows, doors, corners, and the roof. Their job is to direct water away from the joint and provide a clean, finished appearance.
Corner flashings should be installed before the adjacent panel are fully fastened, allowing them to be tucked under the panel edge for a weather-tight fit. Window and door flashings must be sealed with the same sealant used at panel joints.
Ridge flashings at the roof peak and eave flashings at the roof edge are critical for preventing water intrusion. These areas see the most weather exposure and need extra attention to sealant application and overlap.
Use matching pre-painted flashings where possible. Mismatched flashings are not just an eyesore, they can have different thermal expansion rates that cause joint separation over time.
Step 7: Final Inspection
Walk the entire building and check every joint, fastener, and flashing. Here is what to look for:
- Panel alignment is consistent with no visible gaps or uneven joints
- All fasteners are properly seated with compressed washers
- Sealant is continuous at every joint with no gaps or voids
- Flashings are properly overlapped and sealed
- No dents, scratches, or damage to panel facings
- Door and window openings are correctly sized and framed
For cold storage installations, do a blower door test or smoke test to verify airtightness. This test forces air through any gaps in the envelope, making leaks visible. It is much better to find and fix leaks now than to discover them after the refrigeration system is running and ice is forming inside the walls.
Common Installation Mistakes
Based on our experience installing Sandwich Panel across Bangladesh, these are the mistakes we see most often:
Improper fastening. Screws that are too short, too far apart, or overtightened compromise both structural integrity and weatherproofing. Always follow the manufacturer's fastening schedule.
Inadequate sealing. Skipping sealant at joints, using low-quality sealant, or applying it carelessly leads to air and water leaks. In cold storage, this means ice buildup, energy waste, and potential insulation damage.
Thermal bridging at joints. When metal components on the warm side connect directly to metal components on the cold side through the panel joint, heat bypasses the insulation entirely. This is why thermal break details at joints and fasteners matter.
Ignoring expansion and contraction. Panel expand and contract with temperature changes. Without adequate gaps and properly designed joint details, this movement can buckle panel, break seals, and pull fasteners loose.
Rushing the first panel. The first panel establishes alignment for the entire wall. If it is out of plumb or square, the error compounds as you add more panel. Take the time to get it right from the start.
Working with Professional Installers
Sandwich Panel installation is not a DIY project. The combination of structural requirements, thermal detailing, and weatherproofing demands experienced crews with the right tools and training.
At RPS Construction, our installation teams have completed projects ranging from small cold rooms to large industrial warehouses across Bangladesh. We handle the full process from panel supply through final handover, including all structural connections, joint sealing, flashing, and trim work.
Professional installation means the panel perform to their rated specifications, the building meets code requirements, and you get the full service life from your investment. Contact us to discuss your project and get a detailed installation quote.